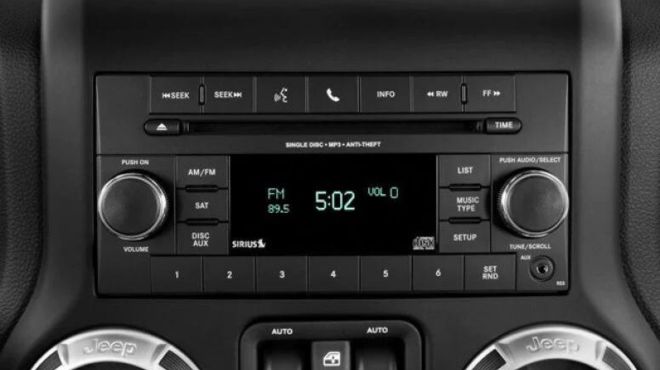
A Jeep’s radio intermittently cutting out is often caused by issues within the head unit itself. The main culprits are a faulty head unit or corroded/loose AM/FM chip pins inside the radio.
If you notice your Jeep’s radio constantly dropping in and out, the problem likely lies with faulty hardware inside the dashboard unit. To resolve it, you’ll need to troubleshoot and replace the glitchy head unit. Or, you can try fixing it by accessing the radio, locating the AM/FM module, and reflowing its solder joints to securely reseat the pins.
Repairing or replacing internal components is the only way to permanently stop the intermittent cut outs and restore solid, uninterrupted radio reception while driving your Jeep.
In this post, I’ll explain what causes this annoying glitch and walk through how to fix it yourself in 5 easy steps. No need to spend money at the dealership when you can solve it with some basic tools and a bit of handywork.
What Causes a Jeep Radio to Cut In and Out?
When your Jeep’s radio starts fading in and out intermittently, there are usually two culprits to blame:
Faulty Head Unit
The head unit itself could have an electrical problem causing the signal to cut out. Here are some specific issues that can occur:
- Power, grounding or fuse problems – If the head unit isn’t getting consistent power from the battery or has a bad ground connection, it can lead to shorts causing the radio to cut out.
- Blown fuse – Many Jeeps have a separate fuse just for the radio system. If that blows, it’ll shut off the signal.
Loose or Corroded AM/FM Chip Pins
Inside the head unit is a circuit board with various chips and components. The AM/FM tuner module has rows of tiny metal pins that connect it to the board. Over time these can work loose or get corroded, resulting in a shoddy connection.
This is actually a really common issue, especially in older Chrysler vehicles. Those small pins deteriorate over the years from heat and vibration. Even a little bit of corrosion or looseness can cause the radio signal to cut in and out intermittently.
Also see – Jeep CarPlay Not Working: Causes and Fixes
Signs of a Faulty Radio
How can you confirm for sure it’s an internal hardware problem causing the cut outs? Here are some clear indicators to look for:
- Power button doesn’t work – If the radio doesn’t turn on at all with the power button, it could mean an electrical issue.
- Volume doesn’t adjust – If you can’t increase or decrease the volume, there’s likely a wiring short inside.
- Can’t change channels – If the preset buttons don’t change between AM, FM1, FM2, etc, the tuner module itself may be having problems.
- Auxiliary input doesn’t work – If you can’t play music through the auxiliary jack, that points to a larger issue.
- Radio cuts in and out – This intermittent fading is the biggest giveaway of a loose chip connection.
If you’re noticing any combination of these behaviors along with the cutting out, chances are high there’s an internal fault within the head unit. No amount of smacking or wiggling the dash will fix it – you’ll need to get in there and rework the connections.
Step-by-Step Instructions to Fix Your Jeep Radio From Cutting in and Out
Ready to banish those annoying radio cut outs for good? Grab your tools and let’s dive in. Here’s an overview of the full process:
Tools You’ll Need
- 7 mm or 9/30” Socket set with extensions
- 2 mm hex head kit
- 58D hot air soldering rework station
- One chopstick or tool to press down chips
- Gloves for protection
Having the right gear makes this much easier. You can pick up a hot air station affordably online if you don’t have one.
1. Remove the Dashboard Trim Pieces to Access the Radio
The first step is to remove all the plastic trim pieces around the radio so you can get access behind it.
Start by disconnecting any cables plugged into the head unit, like the auxiliary input. You don’t want to damage those by yanking the dash apart with everything still attached.
Then remove the air vents. There will be a small square hole underneath the Jeep logo on the vents. Insert a thin stick to pop out the clip holding them in. Twist the vent left to loosen it, then gently pull it out. Do this for all three vents.
Next, use a pry tool to carefully pop off the front dash panel surrounding the radio and climate controls. Look for any screws or clips holding it in place. Use a 7mm socket to remove any screws under the trim.
Once unfastened, start pulling the panel off from the left side and work your way incrementally to the right. Take it slow and use minimal force so you don’t crack any of the brittle plastic clips or mounts.
Panel removal varies, so follow the shop manual specific to your Jeep model and year. But the general process is to detach any connectors, remove fasteners, and gently free the panel starting on one side. Avoid breaking fragile clips in the process.
Now you’ll have open access behind the radio to remove the head unit fully. Time to dig in! Just be sure to organize and label any screws or brackets as you go.
2. Remove the Radio from the Dashboard
With the trim panel detached, you can now access the radio/head unit itself. There will likely be four 7mm bolts, two on each side, securing it to the dashboard. Use a 7mm socket wrench to remove all four bolts.
Once unfastened, pull firmly but gently on the radio to detach it. Be mindful of the wire harness plugs on the back – don’t just rip it all out. Gently disconnect each harness plug by pressing the release tab and pulling.
3. Disassembling the Radio Unit
Now we can dig into the radio components. Bring it to a clean, padded workspace so you don’t scratch anything.
Start by removing the entire front faceplate. Look for clips, tabs or screws holding it on. You may need to pry open plastic locks on the side with a flathead screwdriver. Go slowly to avoid breaking anything.
Once the face is off, you’ll see the CD player module secured by one or two screws. Unfasten them with a T-10 Torx driver. Before fully removing the CD player, disconnect its wire harness plug.
Next, detach the top black cover plate. There are likely metal locking tabs on the sides you’ll need to press inward while lifting up on the cover. Have an extra hand help if needed.
Now the internal circuit board is exposed. You may see foam padding – carefully remove this to access the entire board. Lay it down flat and get ready to inspect the chips and components up close.
4. Identifying and Cleaning the Faulty Chip
Once you have the head unit out and opened up, it’s time to locate the culprit.
Carefully examine the circuit board for any chips that look suspicious. Look for ones that are visibly loose and wobbling. Also inspect for any green corrosion on the metal pins. This is a sign of oxidation from heat and moisture.
The AM/FM tuner module will be a small, rectangular silver chip with two rows of pins. It may be labeled or you can spot it based on the format.
Use isopropyl alcohol and a cotton swab to gently clean any corrosion off the pins. Be very delicate so you don’t accidentally knock off nearby surface mount components. Cleaning off the gunk will help improve conductivity.
Check that the chip is seated flat against the board. Try pressing on each corner to see if it moves. Any motion indicates a bad solder joint that needs reflowing.
You may also notice bent or damaged pins. See if you can use a razor blade to gently straighten them back into alignment.
Now the chip is prepped and ready for the most important step – reflowing the solder connections. This will get those pins anchored down tight where they belong.
Reflowing the Chip Pins
Here’s where the hot air station comes in handy. Turn it on and set the temperature to about 350°F. Use the nozzle to direct a stream of hot air onto one pin of the AM/FM chip. As soon as the solder melts, use a chopstick or other tool to press down firmly on the chip.
Hold it in place while still heating the pin for about 10 seconds. This allows the solder to reflow and the pin to seat tightly against the board. Do this for every pin, reheating each one while pressing on the chip.
Be patient and take your time – you want solid, melt-proof connections. Periodically check that neighboring components don’t overheat.
Reinforcing the Chip (Optional)
For extra assurance, you can glue or epoxy the edges of the chip to the board after reflowing. Just don’t use so much that it oozes onto other nearby parts. This will permanently apply pressure so the pins don’t loosen over time.
Reassembly and Testing
Once all pins are reflowed and reinforced as needed, carefully reassemble the head unit and install it back in your Jeep. Reattach the trim panels and screws. Then comes the fun part – testing your handiwork!
Turn the key on and try out the radio. Hopefully those pesky cut outs are gone for good. Bump the tunes proudly knowing you conquested this repair yourself.
Next I’ll go over some additional tips for resetting the Uconnect system if needed. Almost to the finish line!
5. Resetting the Uconnect System: Optional
If you have a newer Jeep with the Uconnect entertainment system, you may also want to reset it after getting the radio working again. This can clear any glitches and ensure a clean slate.
Here’s the process:
- Turn off the Jeep fully by opening and closing the driver’s door after shutting off the engine. This discharges all power.
- Insert the key and turn it to the “on” position without cranking the starter. Press and hold the power button and volume knob for 30 seconds.
- Turn the key off again, open and close the door, and let the Jeep completely reset.
- Start it up normally and test out the radio, Bluetooth, navigation and other media functions. With any luck, that cleared up any gremlins in the system!
Resetting Uconnect essentially reboots everything which can fix small errors that accumulate over time. It’s some extra insurance to make sure your repair work lasts.
Almost done! Just a few final tips to go over in wrapping up.
Also Read – Uconnect Box Requires Service: How to Fix? (Complete Guide)
Conclusion
Alright, hopefully now you have all the knowledge needed to get your Jeep’s radio working perfectly again!
Summing up, the most common cause of a radio cutting in and out is a loose AM/FM tuner chip in the head unit. Reflowing the solder joints and pressing the pins tightly back into place is usually all it takes to restore a solid connection.
While it takes time and care, this fix will save you money compared to paying a shop. And you get to keep enjoying your ride with peace of mind knowing you solved the problem yourself. That’s a WIN in my book!
If you need any extra help, check Jeep repair forums for tips specific to your model. And feel free to drop me a note – I’m always happy to provide more troubleshooting advice.
At the end of the day, being able to maintain your own vehicle gives you confidence and control. Nobody wants a flaky radio ruining their street cred! Applying your own elbow grease pays off big time.
Now get out there and flex your DIY skills. Revive that worn out sound system and let the uninterrupted tunes fuel your next adventure. Keep on rockin’ in your Jeep!
